Why a solid body Uke?
I have been wanting to build a solid body electric uke for a while. I see this as a starting point since the construction should be more straightforward than a fully acoustic instrument although a lot of the techniques and processes are similar.
I had come across this stunning 3/4 sized electric guitar body blank in quilted burl sequoia from a guy on Facebook. Due to its odd size, it wasn't much use to other people but I thought I could squeeze a couple of ukes from it.

Not wanting to ruin this piece I wanted to also build a couple of other ukes as practice. Despite having tonnes of wood I couldn't find any suitably sized blanks in my stash, and not having the table saw and planer set up meant I couldn't cut down thicker stock sensibly. Argghhh!
Anyhow, I finally found something that would work. Last summer I bought a shop counter from a local country store that was closing down, it was an old hockey-stick shaped bar but it had a solid mahogany top. I "reclaimed" the top and sold on the rest to a chap to use as an actual bar again. An offcut of this worktop and some careful planning would yield 2 bodies but they were a bit thin so would require separate "drop-tops" (the term for a different wood top on electric guitars). As luck would have it I had just found a quilted maple top with issues for cheap on eBay!
So a bit of time designing and drawing templates, first on paper, then on the laptop and we have something that is starting to resemble a guitar/uke looking thing (ish).

I decided on a "Les Paul Junior" double cutaway inspired design for a few reasons. Firstly I've always loved the Les Paul (I still have an Epiphone LP gold top in the loft from nearly 25 years ago). For my first attempt, I didn't want to do a carved top as per the LP so instead, the Les Paul junior has a flat top. However, a single-cutaway LP jr whilst more sensible as a uke, looks too much like my Pete Howlett Revelator and I don't want to get in his bad books with design infringement stuff. And lastly, I've not seen another Les Paul Jr double cut as a ukulele, so at least this will be different!
Plywood ukes
So the first task, having made a digital file, was to test cut it in some scrap plywood.


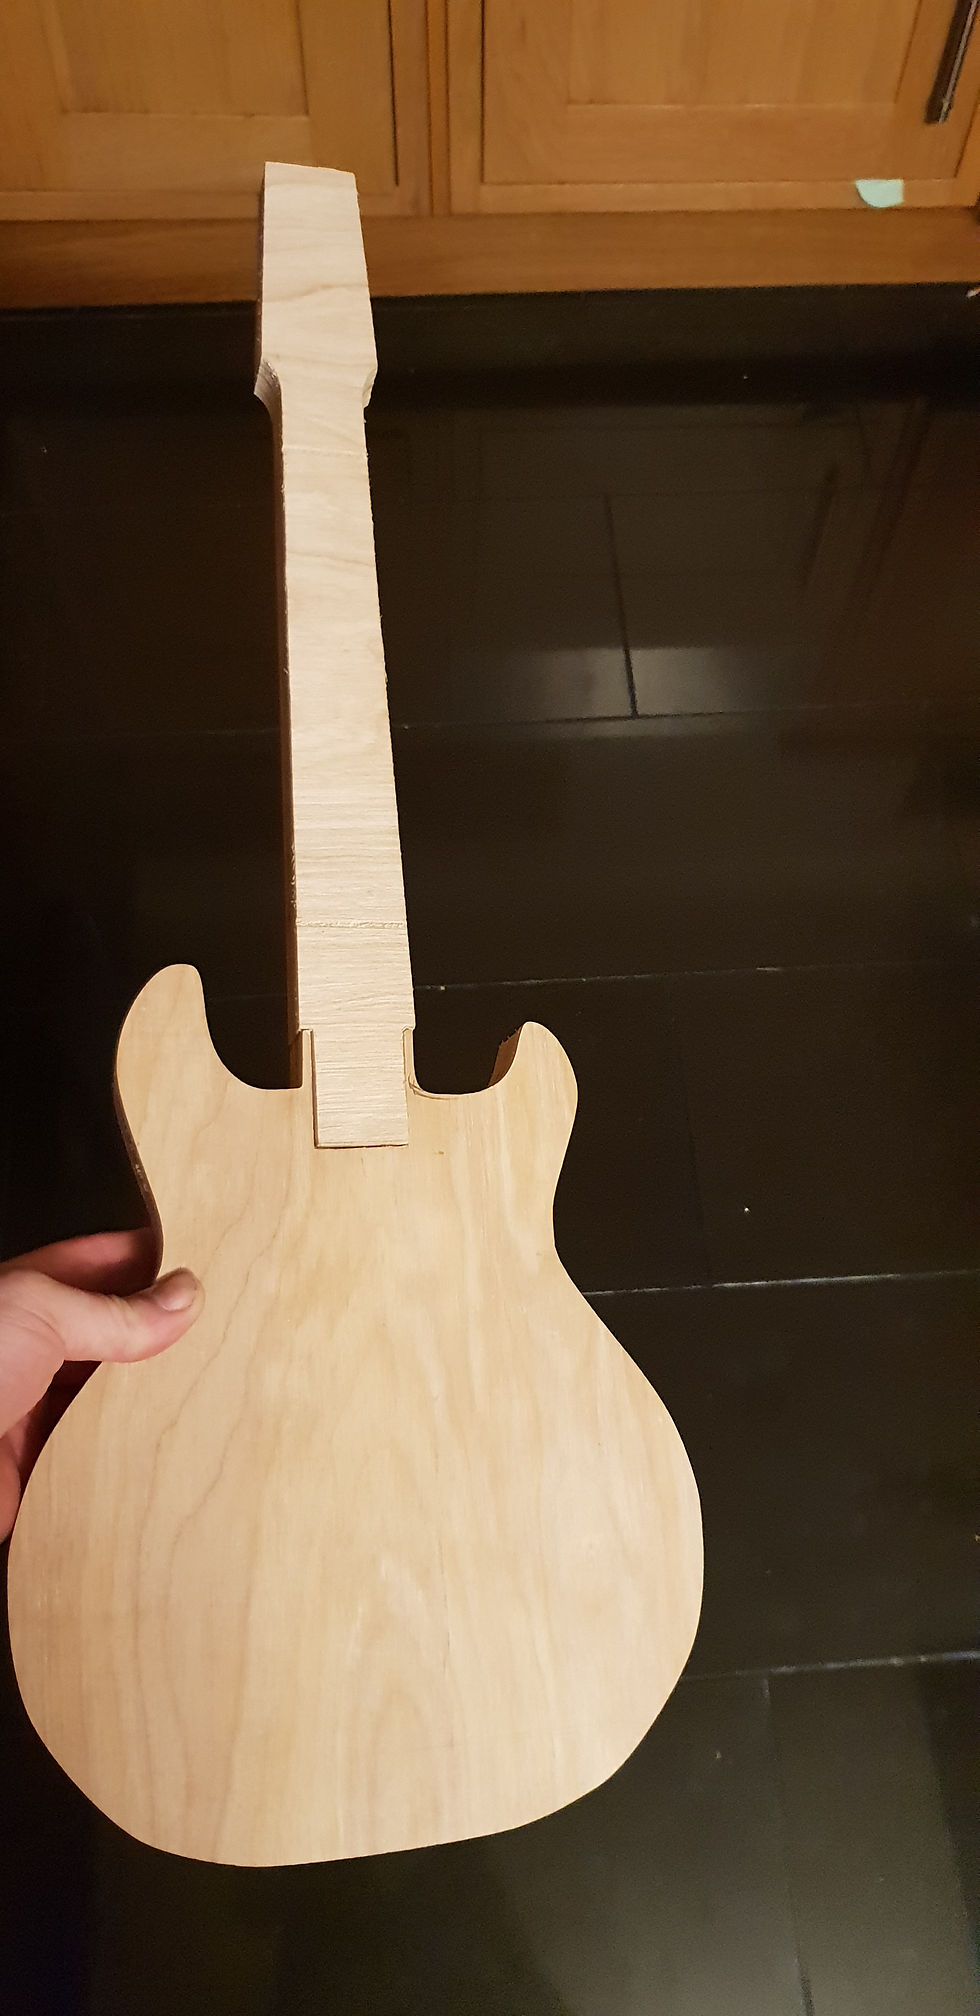


There were a few things I wasn't happy with, mainly the smoothness of the lower body curves, the shape of the horns and the neck pocket fit. So a few more hours were spent on the laptop re-designing.
Body sculpting
Once I was happy with the shapes and neck pocket fit, I mounted the mahogany worktop offcut on the machine and started the process of machining two bodies.
Firstly the board was levelled using a 1 inch fly-cutting bit. This left the stripe patterns, as seen in the photo below, due to the machine being very slightly out of "true" (square in the vertical axis versus both the x and y axes). These lines are very feint, they are barely noticeable to the touch and a light sanding removes them, when I service the machine next I will try and re-shim the router mount to fix this but it is fractions of a millimetre.
The outlines of the two bodies were lightly engraved to ensure the positioning was exactly right. You can see how close to the edges it was, the two bodies are angled slightly differently to get them to fit, whilst avoiding the screw holes. Just one of the many difficulties in working with offcuts and reclaimed timber.

Next the outline of the body cavities were carved with a 90-degree v-bit, this will leave a chamfered top edge where the body joins to the top, commonly used to avoid buzzing in semi-acoustic and acoustic instruments.

Next the body cavities and neck pocket were routed using a 1/4 inch bit. Although this is technically a solid body uke, due to the weight of mahogany I decided I wanted to add some weight reducing cavities. There is also a channel for the pickup jack socket which will be added later, this is a design choice that I'm not sure about in hindsight. Traditionally, you would have a cavity to access the jack socket and pickup from the rear of the instrument with a screw-on cover. I've never been a fan of plastic covers on these and would much prefer a continuous wood body. So I have designed this oversized cavity to be able to blindly feed a pickup through from the top and to fit a socket from the bottom. Time will tell if this was a bad idea or not.

With the bodies chambered I next wanted to add the drop tops. Normally this would be a straight forward procedure, but again due to working with scraps, I couldn't take the bodies off the machine in fear of losing the alignment which is very tight with no room for even a 1 mm deviation.
Instead, I cut out two book-matched drop tops, jointed them and glued them up before gluing them down to the body blanks still on the machine. Note the alignment holes in the body and tops to aid getting this accurately lined up. These two tops came from a guitar drop top blank that I got cheap as it had some severe cracking. I filled the cracks with an epoxy and black mica mix, which once surfaced and polished should add a little sparkle.

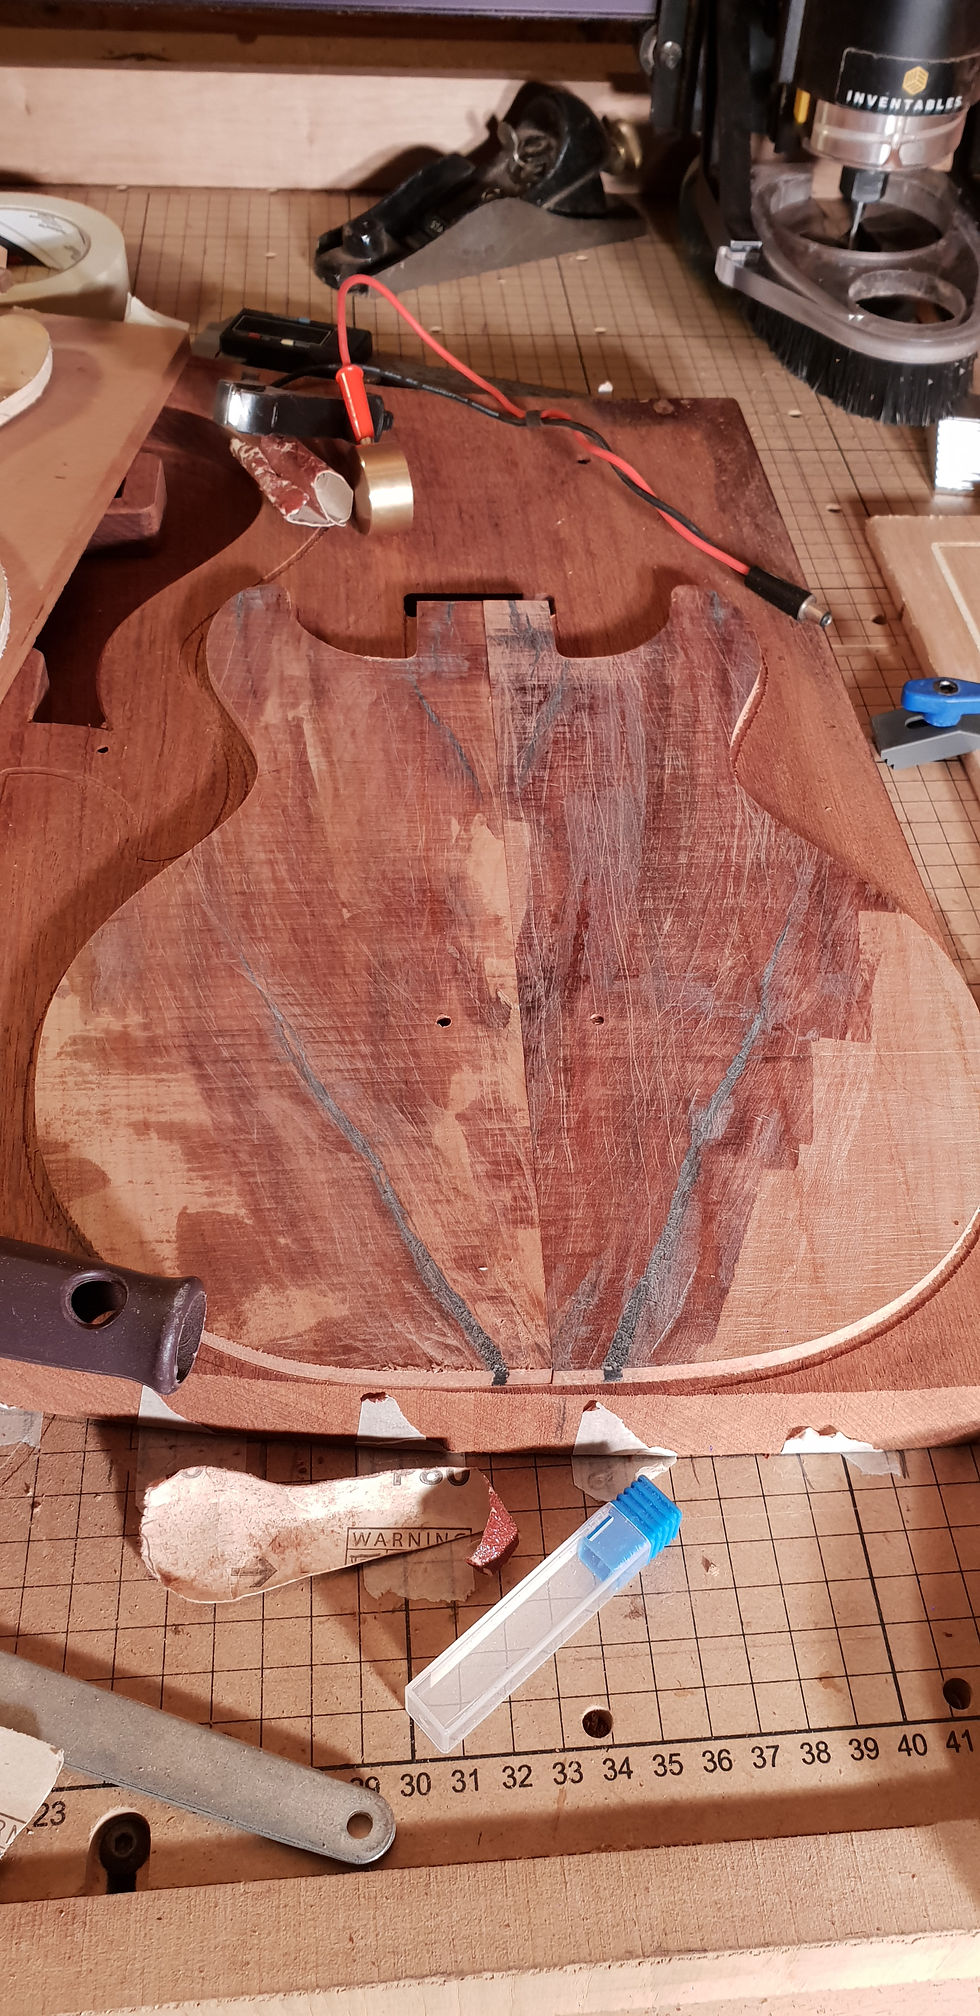


Once the tops were set, I decided to try adding a binding channel to the bodies before cutting them free. I mean, why try just one technique at a time when you can try all of them!
So I carved a shallow channel over the perimeter of the two bodies, which was then filled with more black mica epoxy.

Once set, the bodies were then surfaced, and cut through. I rounded the back edges on the router table and then after a bit of sanding was left with two bound mahogany bodies with figured maple tops.


The next step for these is a lot of sanding, some grain filler for the backs and possibly some stain to bring out the grain patterns on the front.
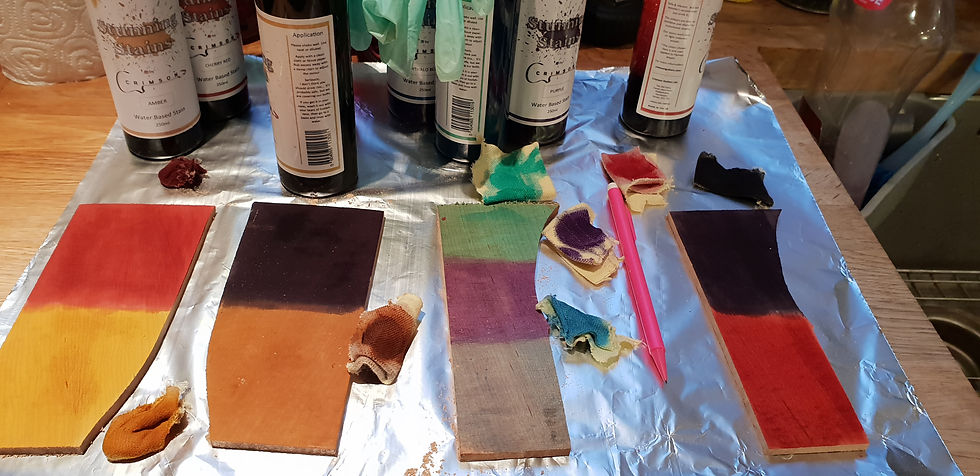
I had a little play with some Crimson Guitar water-based stains on the offcuts from the tops, a lot of the colour combinations are a bit off the wall, but high contrast colouring is quite common on electric guitars with maple tops. The first stain covers everything, this is then sanded back leaving only colour on the deeper grain, the second colour then adds contrast on the shallower grain causing the quilting to "pop". The figure on these offcuts is very minimal and could barely be seen before dye, the third pic shows how much is there once it is contrasted, albeit it's still not very pretty.

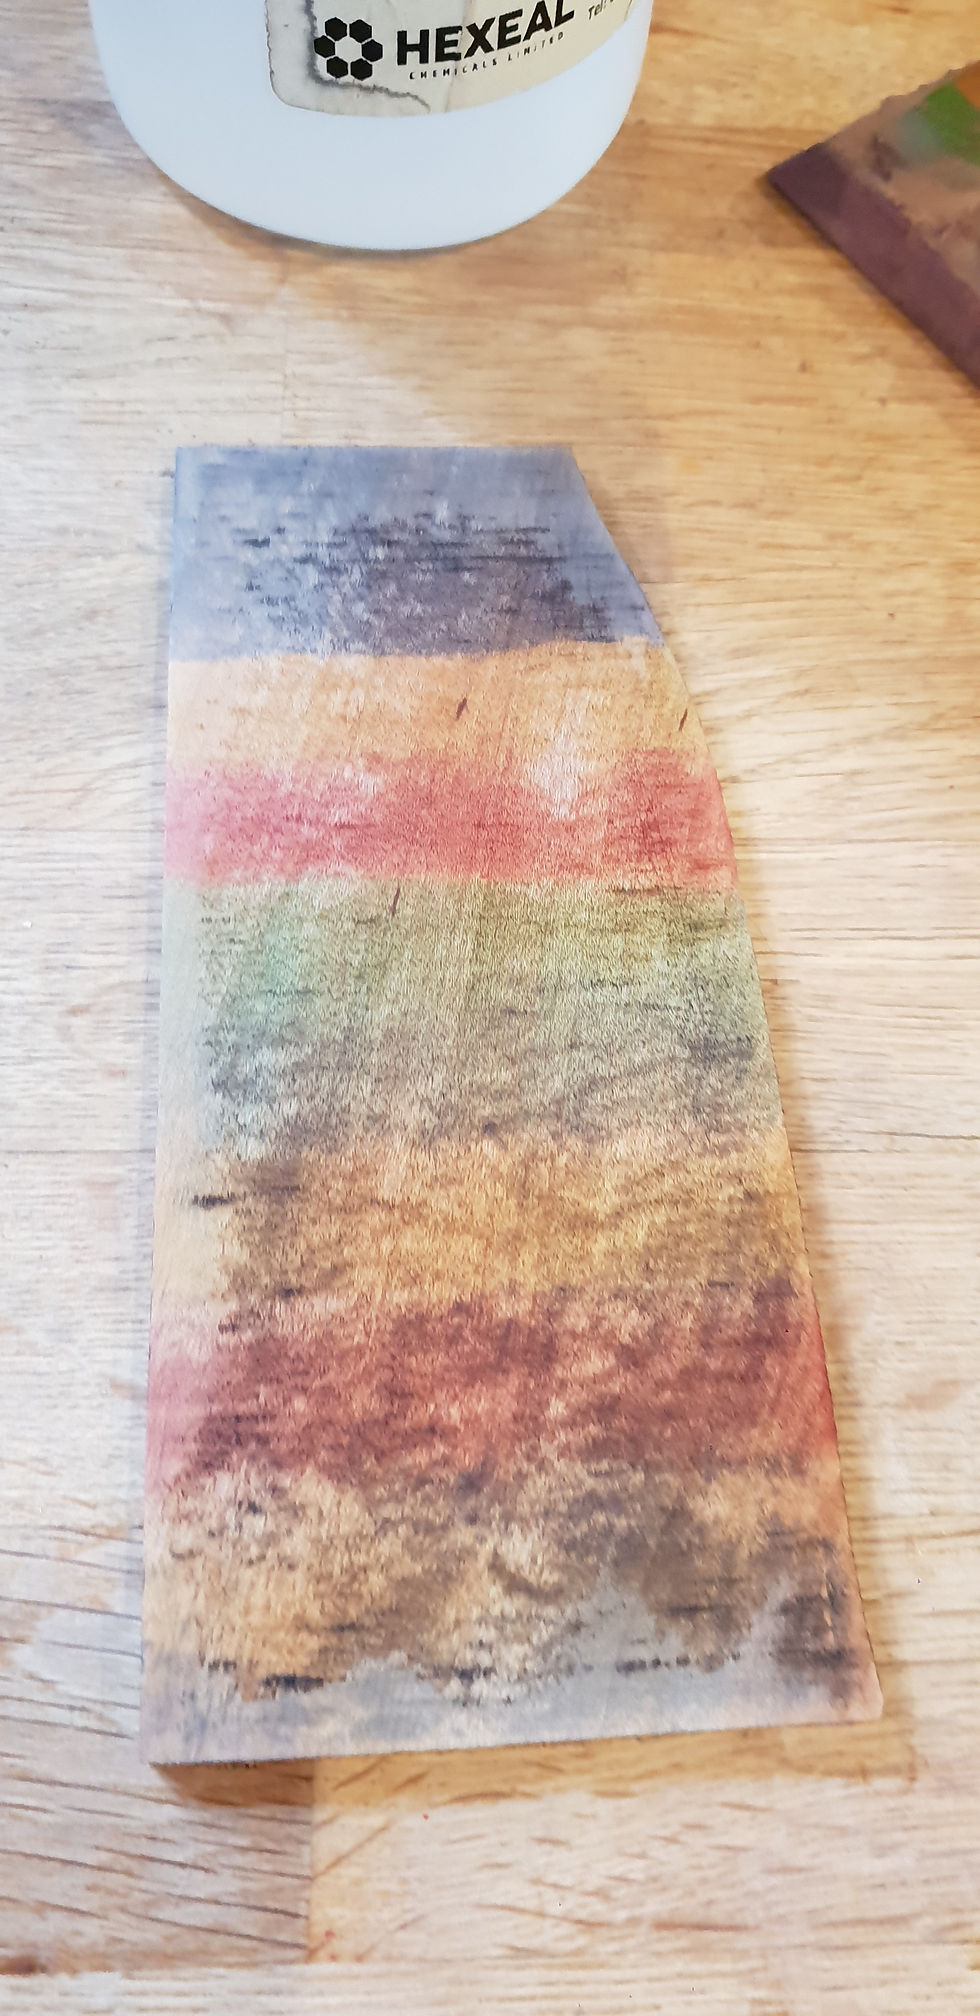


The last two images show a headstock plate that has been dyed with a brown then sanded and dyed with amber. This is the current front-runner for the bodies buy I'm still not fully decided. The photo's don't really do it justice the depth is almost holographic as it moves in the light.

Some sanding and a coat of epoxy with colloidal silica as a grain filler. It looks great in the gloss but it all has to be sanded back to bare wood leaving only the pores filled. My intention was to use an oil finish but I'm not having much luck getting a good pore fill without leaving epoxy on the surface or sanding back too far. So this one may end up with a lacquer finish which should be more accommodating of the epoxy. I may try a different pore filler on the second body since I really want to try the oil finish.
Necked up
Next up is necks. The neck design for these ukes is relatively straightforward, the pocket is not too deep so a single board with a scarf joint at the head will suffice. On a traditional acoustic instrument more of a heal is required to join at the thicker body which usually means either carving from a thicker board or using a stacked heel. For these ukes with a thin-line body, I want a relatively shallow headstock scarf angle so that the head doesn't extend massively beyond the back of the body which leads to easy breakages (just Google broken Les Paul headstocks). There needs to be some break angle over the nut so I have gone with 12.5 degrees, which should put the tip of the headstock inline with the back of the body. Since making a scarf joint is a process that will be repeated for many of these necks (assuming I make more than these ukes) I decided to put some effort into building a set of jigs.
Getting jiggy with it
First up, to cut the 12.5 degree scarf through a board, a relatively simple jig for use on the bandsaw (and table saw once I've set it up). This one clamps to the mitre gauge on the bandsaw and a board clamps to it holding it square to the table and at the correct angle to the blade.

Then to refine this angle and ensure an exact fit for glue up, I designed a sanding jig. This was cut from scrap plywood on the cnc to ensure the angles are as accurate as I can make them.

The two cut neck pieces are taped back to back and clamped into the sanding jig. The clamps are made from some coach bolts and CNC cut star-shaped knobs (in scrap oak that was stained black with iron and vinegar for looks)

A sanding board then rides on the side rails and sands the angled faces of the neck down to the level of the jig sides.
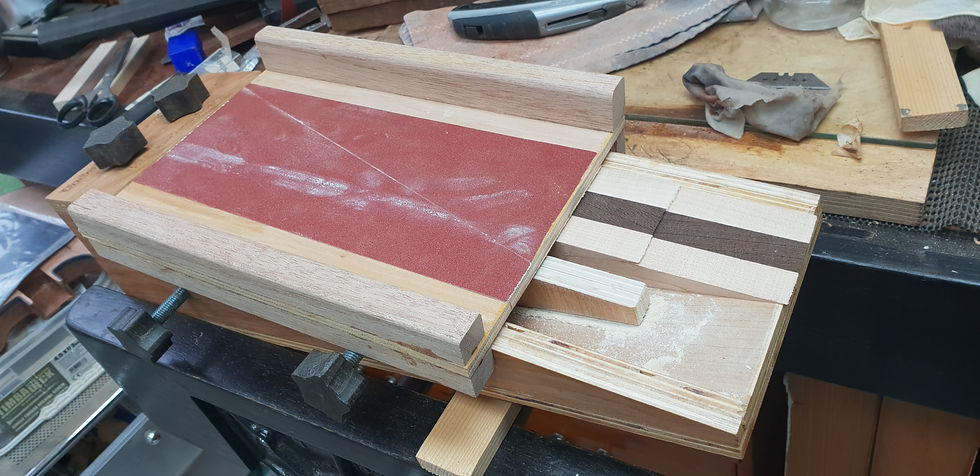

The pieces are then removed, the smaller bit flipped over and glued to the backside creating the angled headstock.
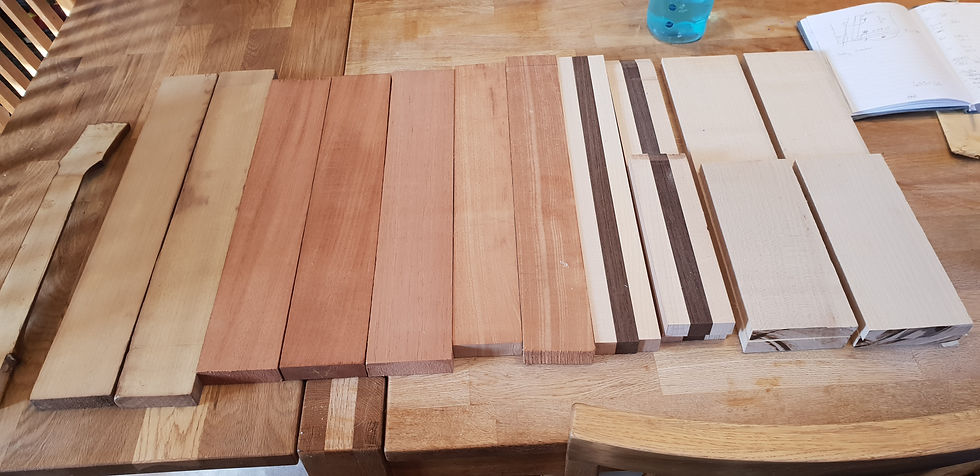
A selection of neck blanks in a variety of materials. Right to left, two sets of maple (these I'm going to add a contrasting wood stripe once I've got the saw set up). Next are two laminate blanks of maple/wenge/maple. The next three I was told are spanish cedar, however I think the two striped ones are something different, they don't have the same fragrance of spanish cedar, possibly balsam fir from the look. Then there are two mahogany boards and finally two more unknowns.
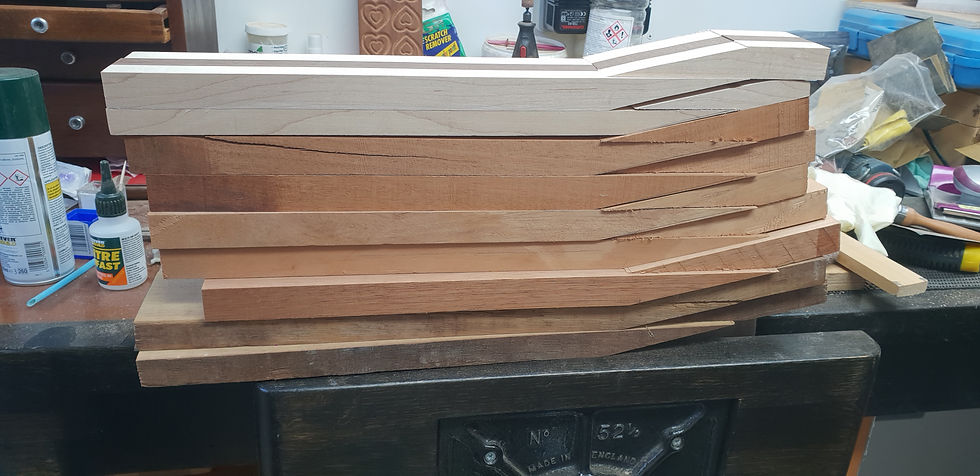
All cut and stacked read for gluing
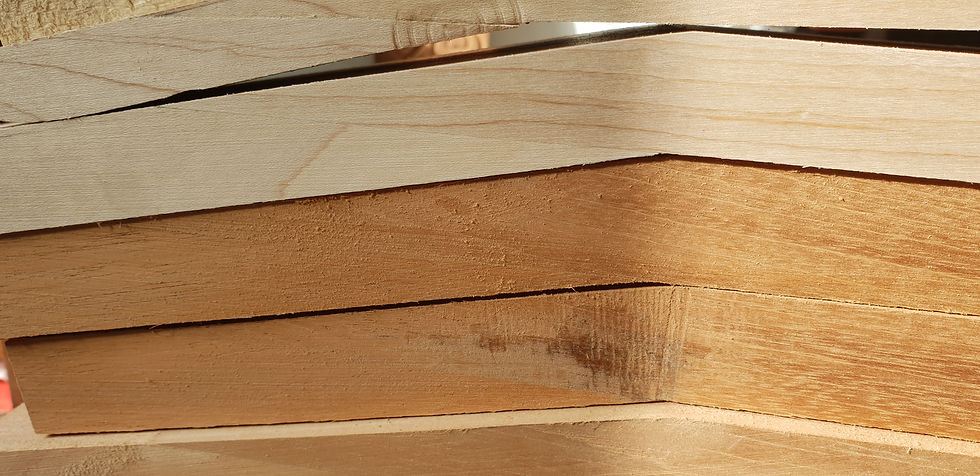
Some nice tight glue lines.
Next, I need to finish up designing the neck. I made a mock-up out of lime wood, and hand-carved and shaped this.

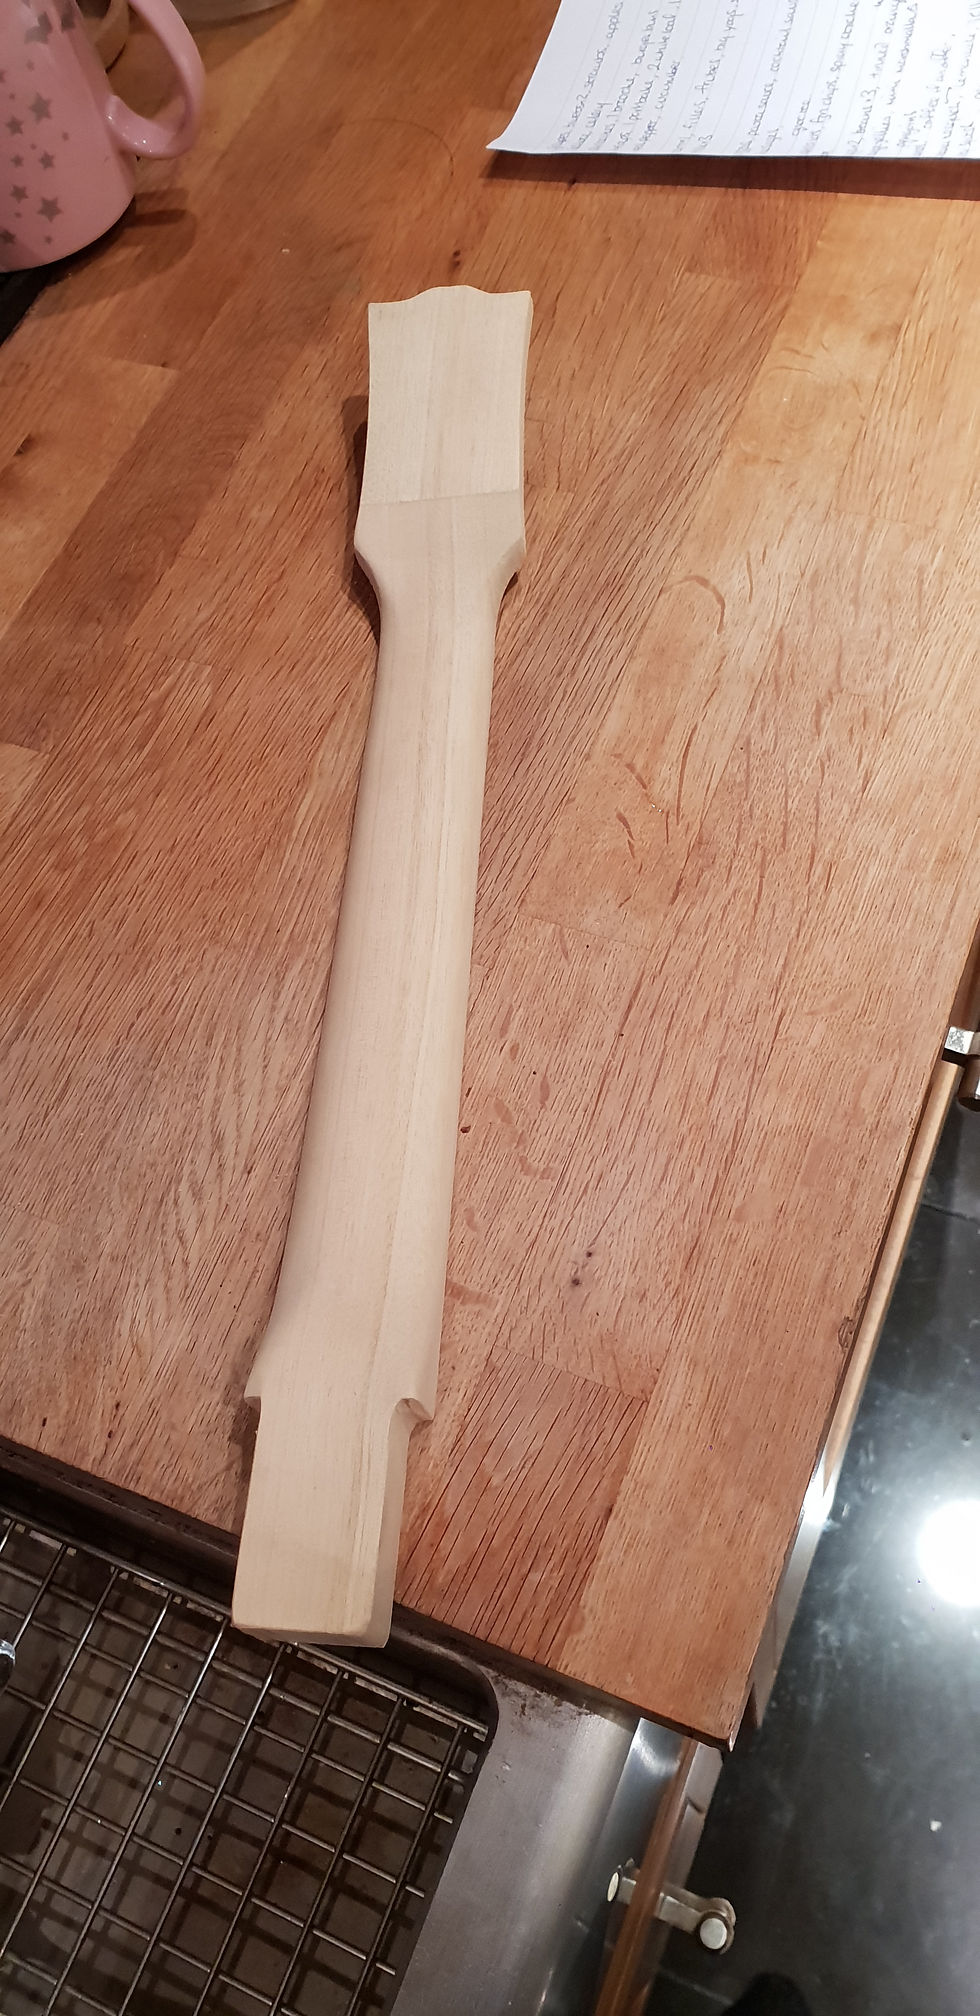

Whilst I'm happy with the neck profile and carving it by hand, I want to do a bit of the bulk removal on the cnc. I am currently working on building a fixture for the cnc to hold the angled neck/headstock and allow reproducible placement for cutting of the outline of the neck and headstock and thicknessing the neck.
Sequoia
Whilst working on the necks I've also moved the third body on. This fantastic bit of wood had been made into a 3/4 size electric guitar body and used for advertising images. The shape is big enough to re-cut for my LesPaul Jr esque DC shape but it had had some body relief carving done already so I wasn't able to split it in half and have enough for 2 full thickness bodies. Instead I cut a 1cm slice off the back which will yield a drop top to add to a different back and leaving a single solid body. The sequoia is much lighter than the mahogany despite being thicker, so I don't think it requires any chambering so I just went ahead and machined it out.


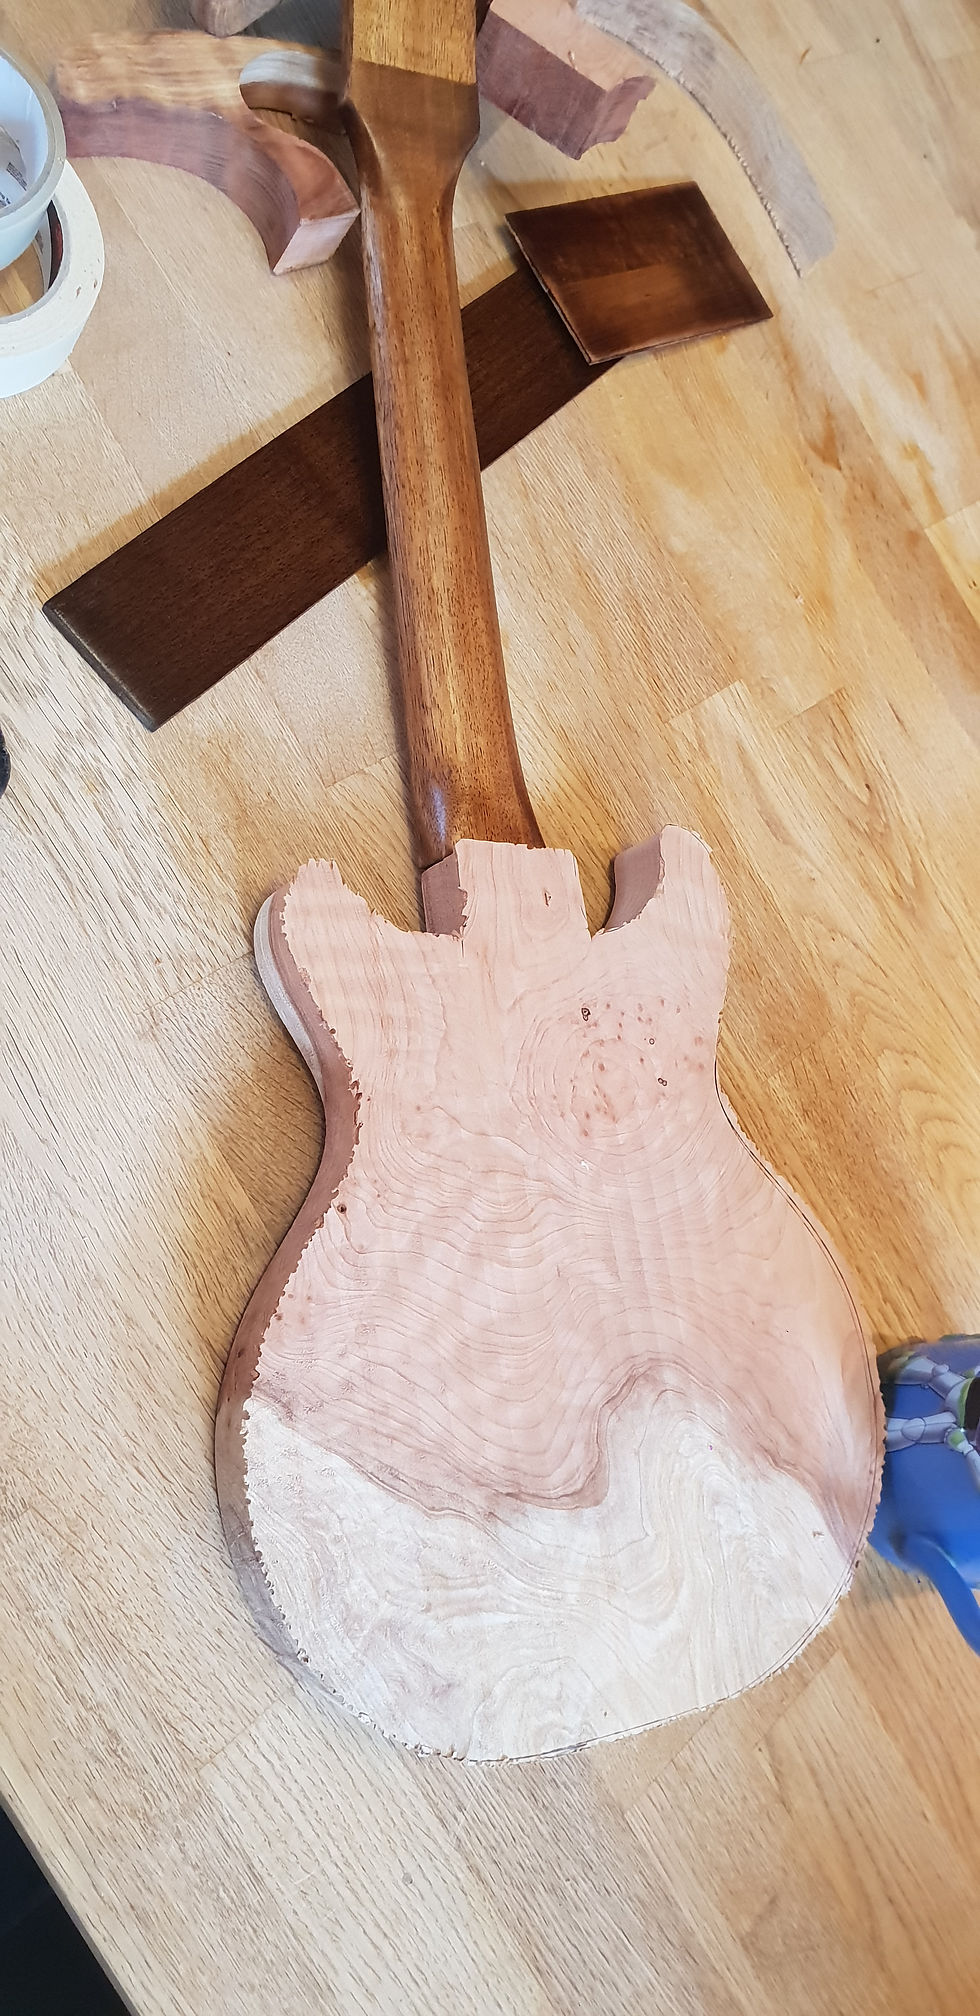
I then rounded over the back on the router table and added some body contouring using a rasp and file. A bit (lots) of sanding later and it's starting to look good.
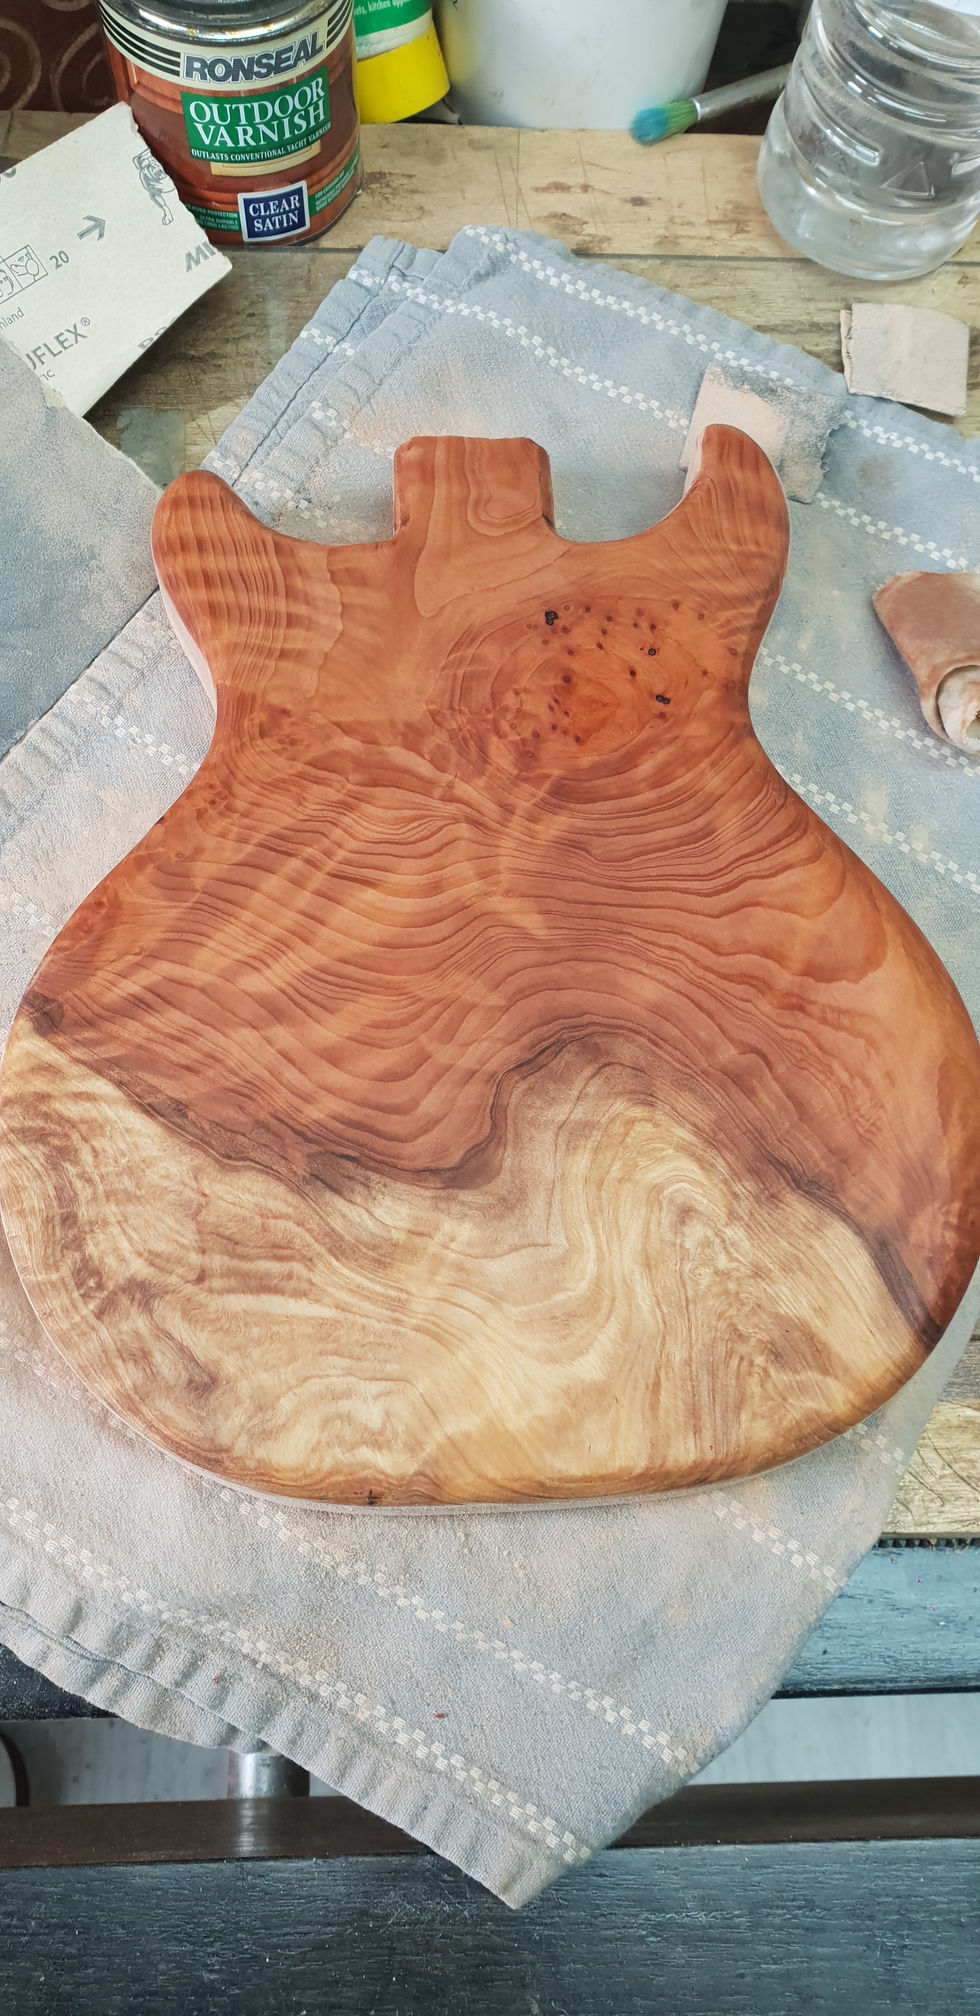
There are some soft spots on the edge of the burl so I have bought some "wood juice" which is recommended to stabilise soft wood, I am currently testing a piece to check how it dries and finishes, so this one will have to wait a few weeks before it goes any further. This is a shame because I really want to see it finished.
However, I have plenty still to do, building jigs, designing the bridge and fretboard and all sorts of other side projects that keep popping up. On that note, my next blog will be on side projects.
Congratulations for getting through all of that, stay tuned for more, click on subscribe on the homepage to receive notifications of future blogs.
Comments